Wicked Edge
http://www.wickededgeusa.com/
If you are a knife guy like me or have a wife or husband who is a chef you have likely dulled a knife. There are many ways to sharpen knives out there and a lot of them are not super good for the knife or take considerable practice, patience and skill to operate. Thankfully due to a post on the USN I stopped by the Wicked Edge booth at SHOT show. I had just got my brand new Strider SMF and wanted to get a look at their units. Striders are hard to sharpen on most sharpening systems due to the angle of the edge. The Wicked Edge team at the booth were more than happy to show me the system on my knife and proceeded to have a good chat with me while doing it. When the knife was finished it could shave hair off my hand almost as good as my Gillette razor. Now this likely isn’t a system for you if you have cheap Chinese clone knives you get at the flea market or most surplus stores. This system is if you own knives worth depending your life on or quality kitchen knives.
Pro’s
- Easy enough for anyone to learn how to use
- Creates razor sharp blades at a variety of angles all the way from 15-30 degrees per side
- Can be used to change the profile of a blade from slicing to a long lasting edge
Con’s
- Large size makes it not overly portable
- Price is out of reach for the average knife user
- The tip bevel will be a bit narrower than the rest of the knife
- You will end up sharpening every persons knife you know once they use yours
Overview
When using typical stone sharpeners most people run into the same problem. They can’t keep the stones at a consistent angle and in a lot of cases have an uneven grind. I have seen some people even round an edge out not knowing what they are doing. The other system that a lot of people turn to is the carbide V style ones you drag the edge through. These make an edge that appears sharp but will wear out quickly. The only reason these cut at the time is due to the metal tearing and basically creating micro serrations. The Wicked Edge system helps fix all these issues by allowing you to set a specific angle, and polishing the edge as you go up with each grit.
When I got my kit I did not order the base as it would cost a fortune. I just figured I would build one in my shop. I aimed to create a base that was not wider than the angle adjustment arms and still hold the sharpener steady. This was a learning experience in more than one aspect and I will list out what I did wrong and what I could have done differently. The first of my mistakes comes from the old saying of RTFM or read the fucking manual. I did not and like a typical testosterone driven man pushed on thinking I know best. I cut out my piece of wood measuring the distance of the arms and placed the template on the piece of wood. This resulted in two separate failings. First I did not cut the template out which isn’t centered its slightly off. This caused my arm on one side to stick off by almost a centimeter while having a gap on the other side. The second failing was slightly before this but I put the template on the wrong side of the board. I did this to avoid chipping of the veneer when I drilled through. I forgot to take into account the screw holes being reversed if I did this and had to re-drill them on the other side. So back to reading sometimes it can save you a bit of work. Now my base is thinner then the stock base which required me to fish around in the bolt bucket to see what I could find. Thankfully I found two that were the perfect length. Once it was attached I realized several other things I would change if I were to do this again. The first is I would attach a rubberized material to the base to stop it from sliding on the table. The second would be for me to make a base with a bit more weight and possible storage for the stones in it. I still may buy the Wicked Edge base to see how it performs.
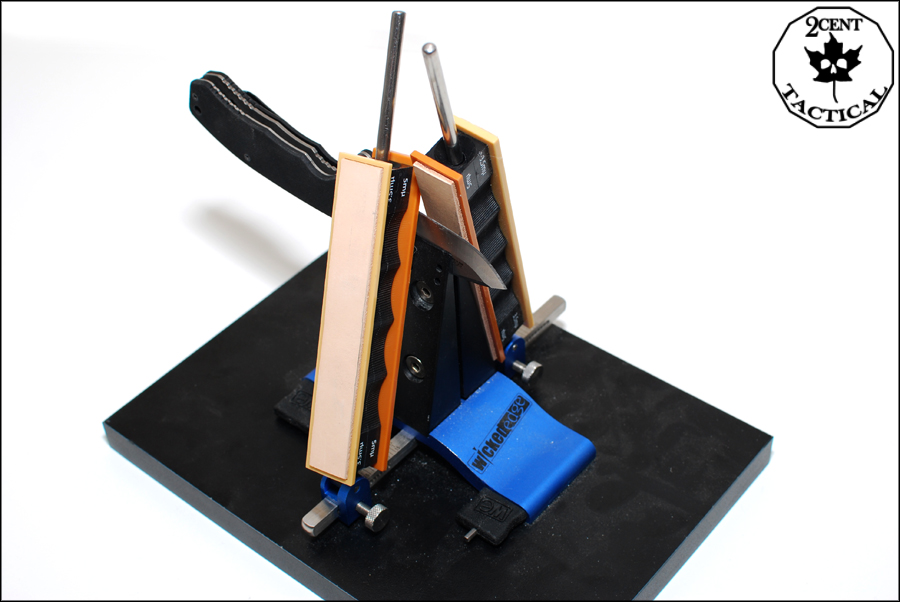
The fit and finish of the wicked edge unit and various stones and strops are superb. The parts are all made of aluminum and steel on the sharpener itself. Each stone or strop has a plastic body with a color mounted along opposing edges. This color makes it easy to identify the matching mate for the stone your about to use so you don’t have to read each number off the body. Attached to the colored sheet is the stone or strop. Each part is molded without any visible issues and is glued together very strongly. I have dropped my stones on hard floor and nothing came loose which was nice.
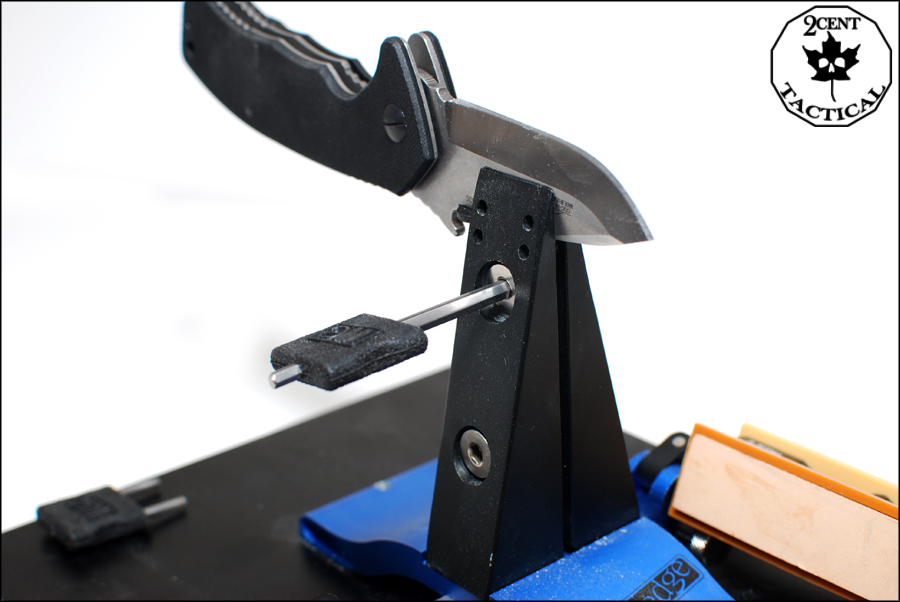
To start sharpening a knife you need to pull the two keys out of the bottom of the metal base. You need to use the hex key to unscrew the jaws. You want to unscrew both the top and bottom screws and move the jaws out.
Now you take the second key with two prongs and insert it through the set of holes on the other side. I typically use the bottom set of holes unless I am sharpening a small kitchen knife. Now you place the spine of your knife onto the two prongs and line it up to where you want to clamp it in.
I typically clamp fairly close to the handle when I sharpen a knife unless it’s really long. Now you use the first hex key and tighten the top screw until its tight and then tighten the bottom screw to add a bit more gripping power to your knife. This system allows for maximum grip on the knife so it doesn’t shift while sharpening screwing up your edge. You can now pull the two pronged key out and place it back in the base with the hex key.
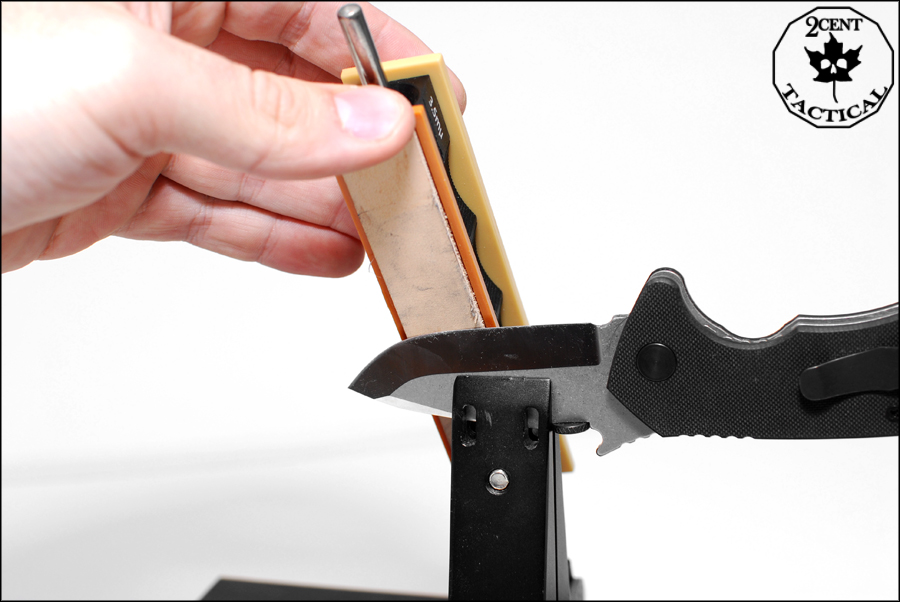
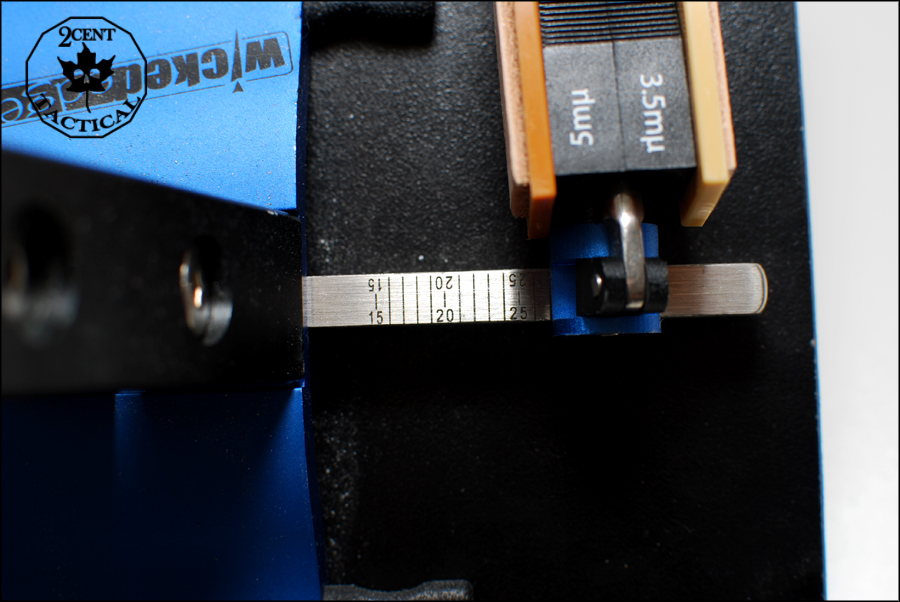
Now you need to either figure out the angle on the blade that you are using or choose one in which you want the blade to be reprofiled to. You slide the square hole of the guide arm onto the arm mounted onto the base with the tightening screw facing the side with all the indentations. In order to figure out what the angle is set at stock I typically put the angle I think is close and look at it to see how much of the stone is touching the bevel. You then have to lock the guide arm onto the angle arm by tightening the screw which goes into the indentations. Once I find an angle that looks really close I run a permanent marker along the edge and run the stone over it a few times. If the edge has a big black streak on it and a silver area on it still chances are you got the angle wrong. If the black is at the top you have got too small of an angle and if it’s at the bottom of the edge you went out to far. This is also a good way to see if the grind on it is straight as you will get the marker nicely removed in areas but not touched in others. If this is the case toss on your low grit stones and try and make the angle straight.
Now you pop on your lowest grit stone if your blade needs a lot of work or you can toss on one of the higher grit ones if it just needs a tiny bit of a touch up. The hole in the center of the stone slides onto the rod and allows for a variety of pulls to sharpen your blade. I prefer the up and away approach as it works with both the strops and stones. If you pull down with a strop you will cut it like I learned on my first try. To sharpen the knife you move the stone along the blade while pulling it up or down the guide rod. When I sharpen I start at the handle with the stone at the bottom of the guide rod and push out and up with the stone. You just keep alternating sides as you do this and eventually you will get into a rhythmic motion that becomes natural. You do this for a bit and then switch up to the next grit which is either just a rotation of the stone so you get the other side or you pop a new stone on. You do this as you go up in grit and the edge will get progressively more polished and sharper. I picked up a strop pack along with my ceramic stones to get my knife just that much sharper. I also find a good stropping here and there keeps my knifes edge hair popping sharp.
The base kit includes the clamp, arms and mounting hardware. You also get a guide and a metal rod meant to stabilize thin and long knives. The stones that are included with the kit are the 100,200,400 and 600 grit stones. This gets you a total of 2 combo stones to use on each side of the knife with 2 grit surfaces on each. I like that each stone has two surfaces on it as you save time having to swap out stones.
Conclusion
The Wicked Edge is really something you have to experience to understand. I can tell you all day that it makes your dull field knife into a razorblade. Your kitchen knife that used to sort of cut things into a surgical instrument. The thing that I like about the Wicked Edge is its ease of use. When they were demoing it we were having a full blown conversation about knives and they didn’t skip a beat at sharpening my knife. I watch tv shows when I am working on several knives looking down every so often to check on my progress. This system is not for everyone as it may be a bit more then you want to spend. However with the knives I own and ones I plan to get it’s nice to know I can maintain my edged tools keeping them razor sharp. The biggest con comes from when friends and family see a knife sharpened on this system because you become their new best friend and you tend to find random knives awaiting your voodoo. I am a firm believer in this system after trying several others. I can sharpen anything from cheap steel to the fancy super steels you find in Striders and the like. If you’re a knife guy and attend the various shows look out for Clay and his crew and get them to make you into a believer. You should also check out Clays YouTube channel for lots of interesting tips and tricks.
A great video by Clay at Wicked Edge on the system
